

DIY – Bridal Sleep Masks With Cricut Maker
-Sponsored Post-
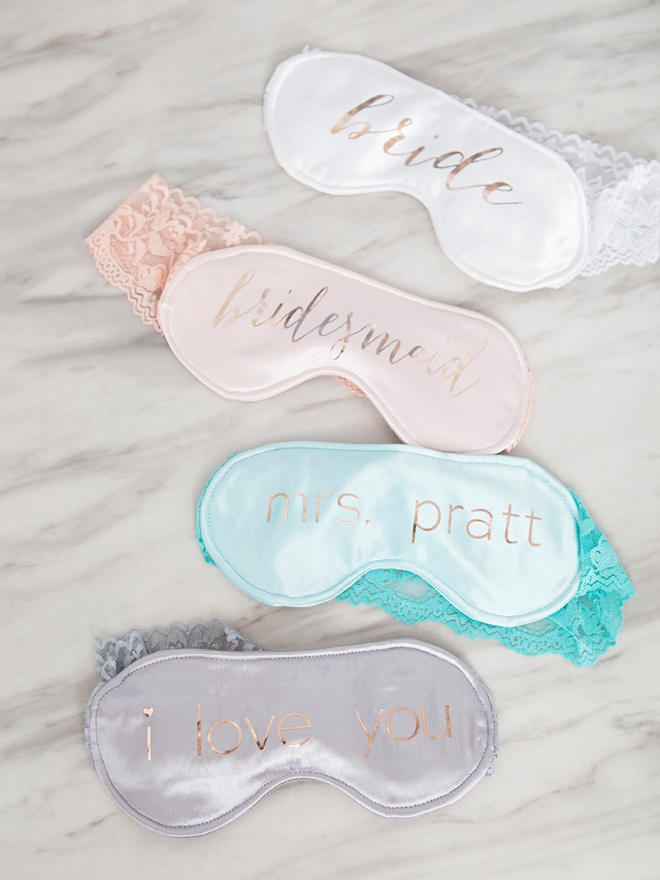
It’s Friday and I want to go back to sleep… because these sleep masks are just too cute! Since I happen to be a very proud owner of the brand new Cricut Maker, I’m going to start sharing more simple sewing projects because it makes cutting fabric SO easy! Today we’re making and personalizing the cutest sleep masks ever, and of course, I’m sharing the free Cricut SVG cut files at the end of the post. Choose a pretty satin fabric and your choice of iron-on design and in less than an hour you’ll have a darling way to protect your beautiful eyes from that harsh morning light!


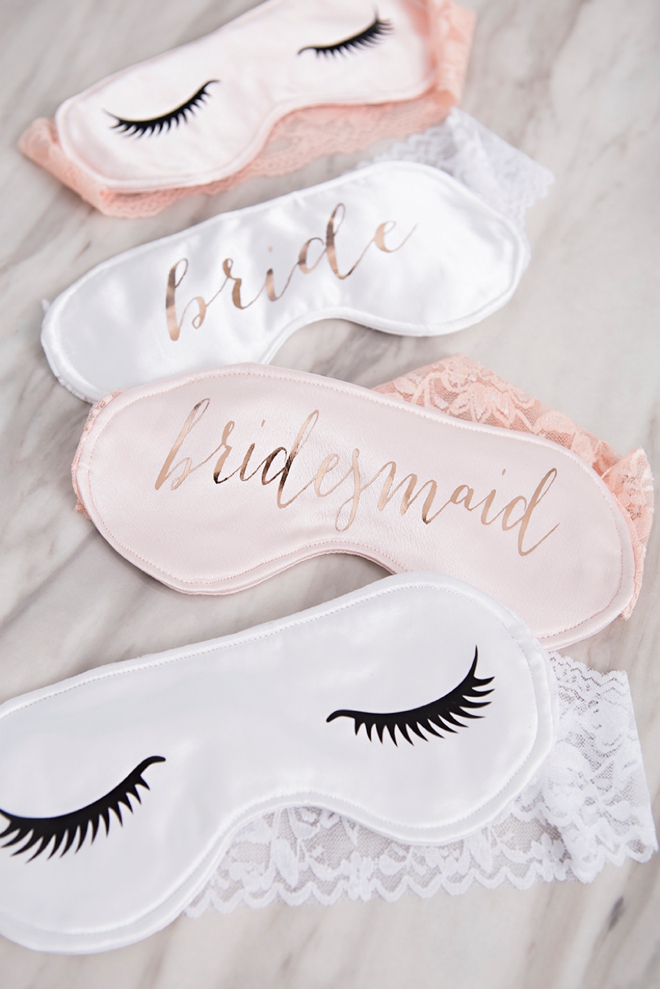
Eyelashes or Saying
For these adorable sleep masks you can use our sexy eyelashes to embellish or any wording you’d like! Mrs. Pratt for example… hey, a girl can dream!

SUPPLIES:
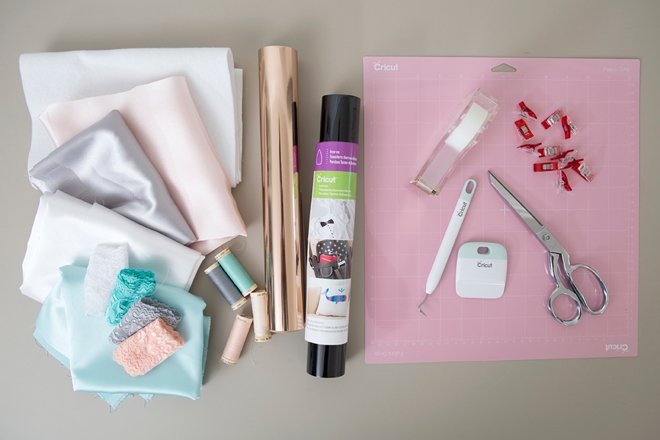
- Cricut Maker
- Cricut Fabric Mat
- Cricut EasyPress
- Cricut Iron-on (your choice, I used lite black and foil)
- Satin Fabric and matching thread
- Elastic Lace
- Fusible Thermolam
- Sewing Clips
- Tape
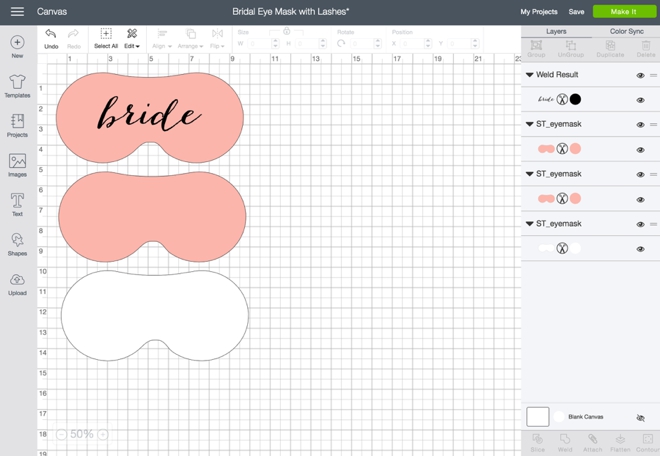
Upload Our Free SVG File
At the end of the post, click to download our free SVG pattern for the eye mask and lashes. Then upload it into Design Space.
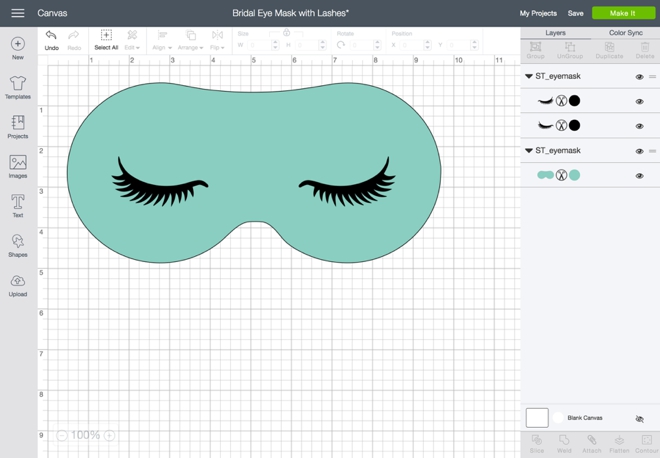
Prepare The File
First you’ll need to ungroup the layers and then duplicate the mask outline twice. You’ll need to cut two out of satin fabric and one out of the fusible thermolam.
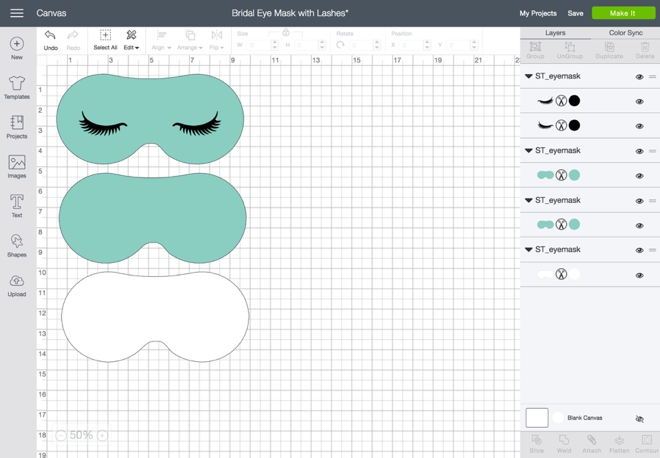
Personalize Your File
Use the lashes or create your own iron-on design! Make each layer the right color of fabric or iron-on to organize your cutting.
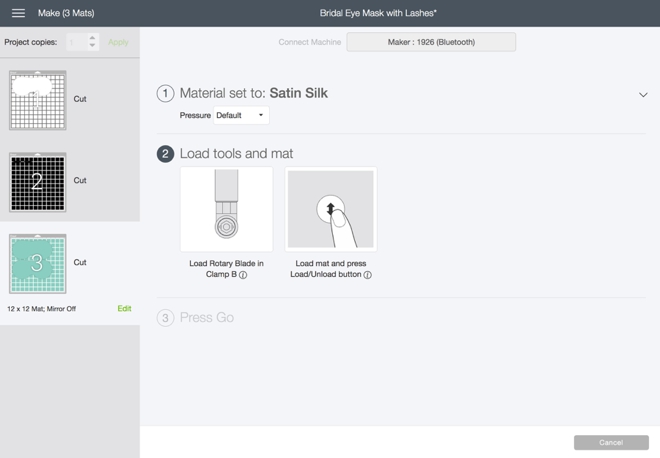
Prepare To Cut
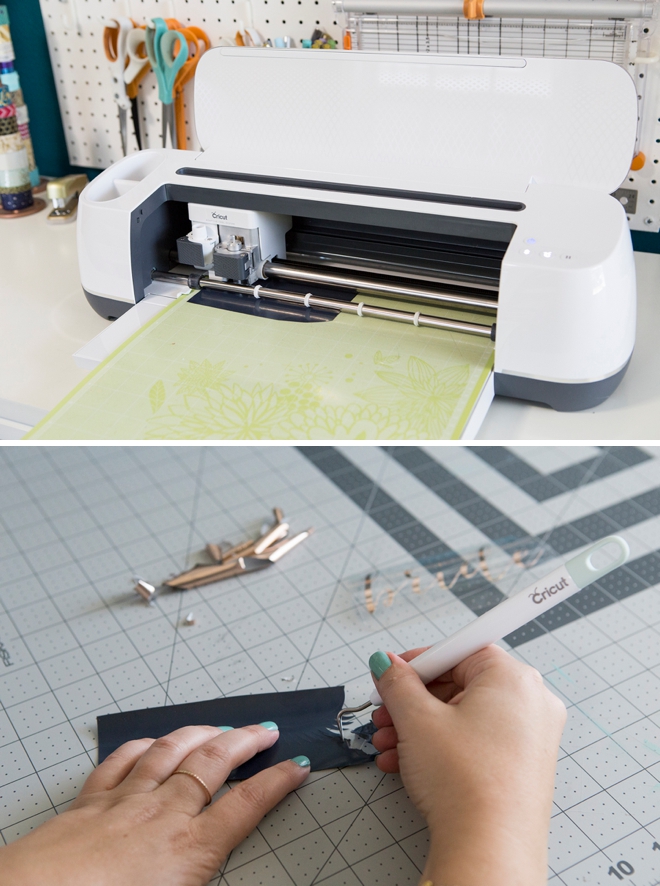
Yes, the fabulous Cricut Maker cuts fabric AMAZINGLY. Simply choose your cutting material before you cut, once set to the correct fabric it will prompt you to use the rotary blade with the new pink fabric mat!
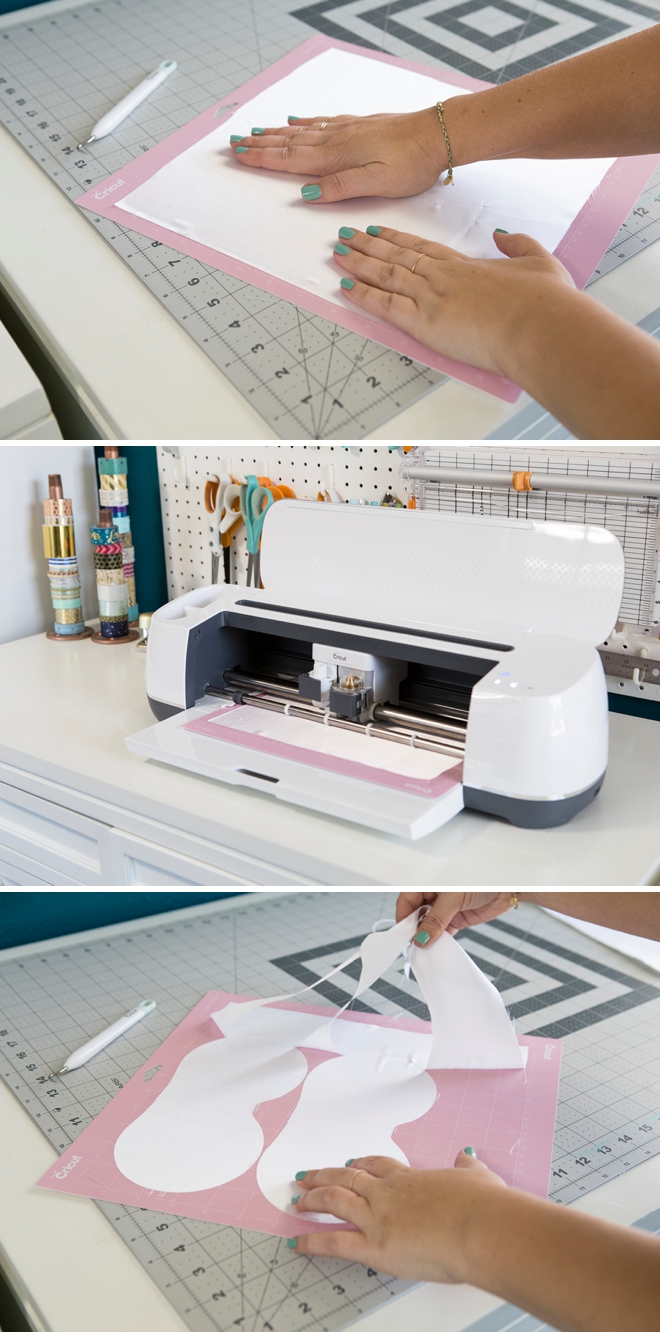
Cut The Satin
Add your satin to the fabric mat and smooth. Then load into the Maker and cut your two mask pieces. Carefully remove them from the mat and set aside.
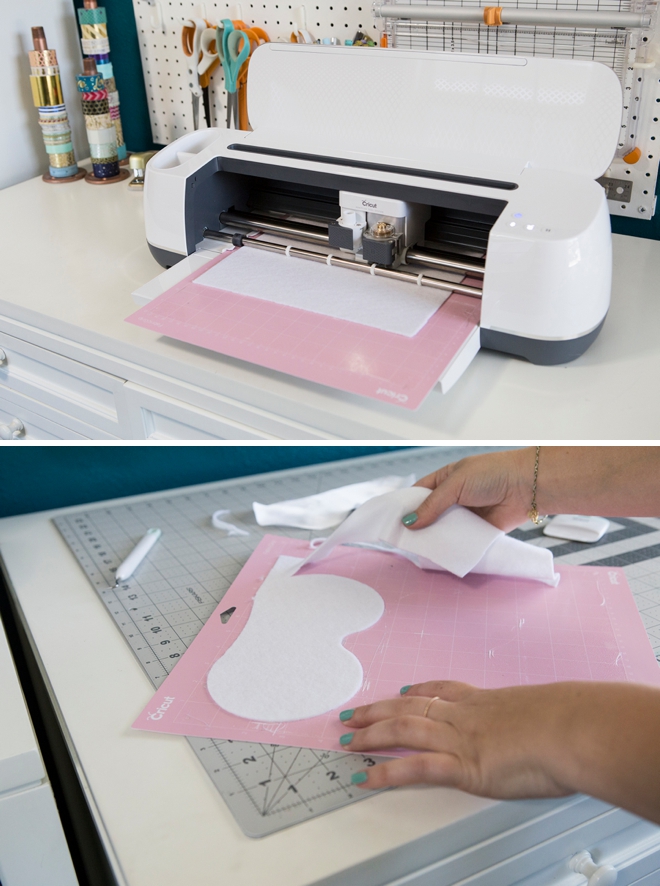
Cut The Thermolam
Fusible thermolam is a thick, stabilizing material that has heat activated adhesive on one side. It adds thickness to the mask and blocks out the light for sleeping. I cut mine on the “wool felt” setting.
Cut The Iron On
Then cut and weed your iron-on design of choice!
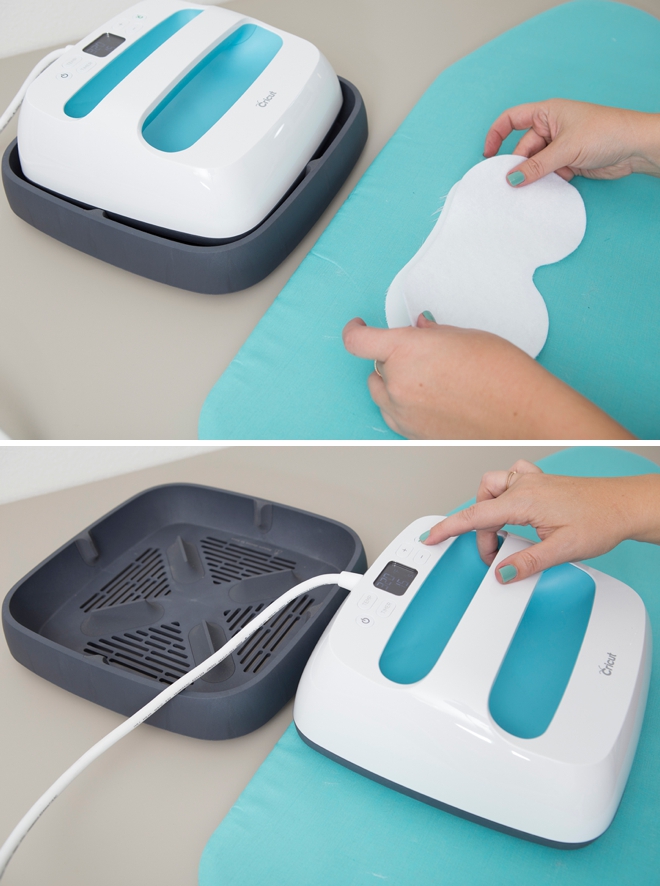
Fuse The Thermolam
Using the fabulous Cricut EasyPress (which is like the best iron and heat press all wrapped into one), fuse the Thermolam to the wrong side of one of your satin pieces. I did 325˚ for 15 seconds on each side and it was perfect, that’s the best thing about the EasyPress – exact timing and heat!
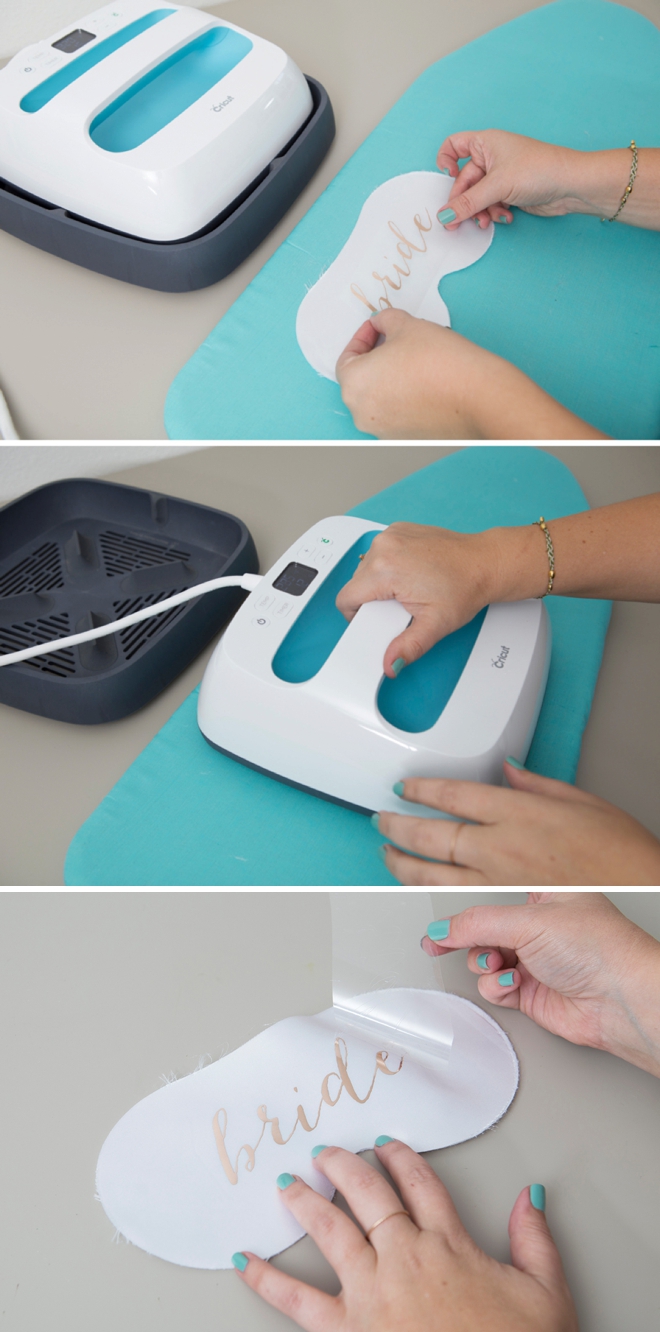
Heat The Iron On
Next, on the front of the piece you just fused the Thermolam to – add your iron-on design! Here you can find a detailed list of heat settings for almost all materials and iron-able supplies.
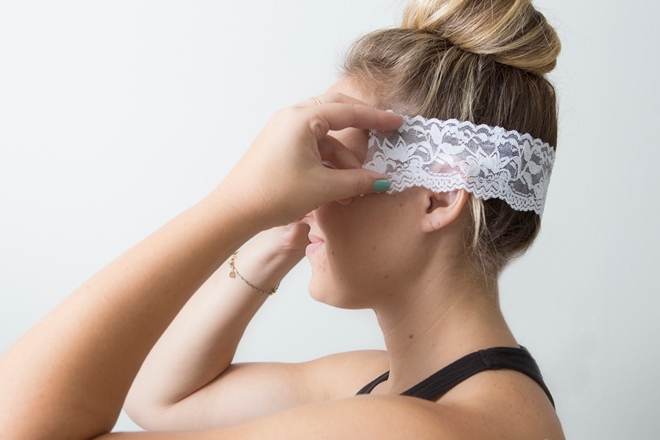
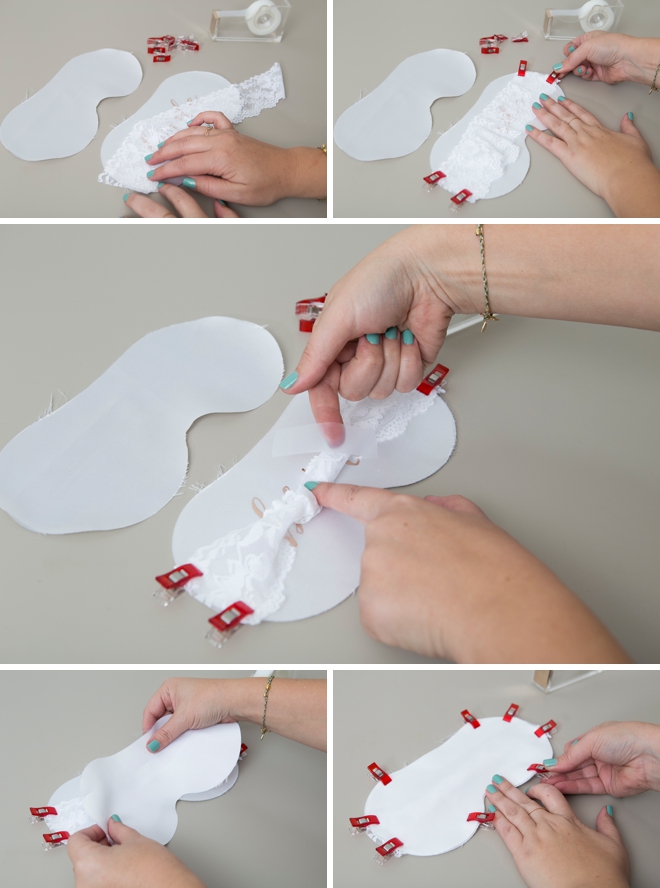
Measure Your Head
Find the right length of elastic lace by holding it across the back of your head, you want it to land about a fingers width from your eye, with a little bit of tension to it.
Prepare To Sew
To assemble the mask, start with the iron-on design facing you and clip (or pin) the lace to each side, hanging over the sides about 1/4″. Fold and wrap the lace in the middle as small as you can and tape it to the middle of the satin, so you don’t sew over it in the next step. Then place the backside of the mask on top, right side down and clip (or pin). I love these little sewing clips because they are so much easier to use than old school pins.
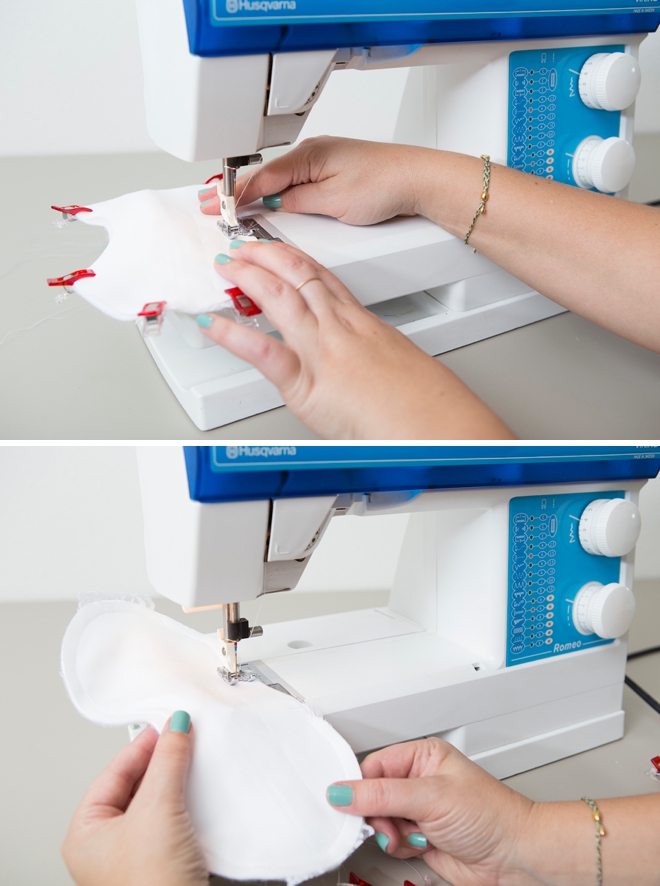
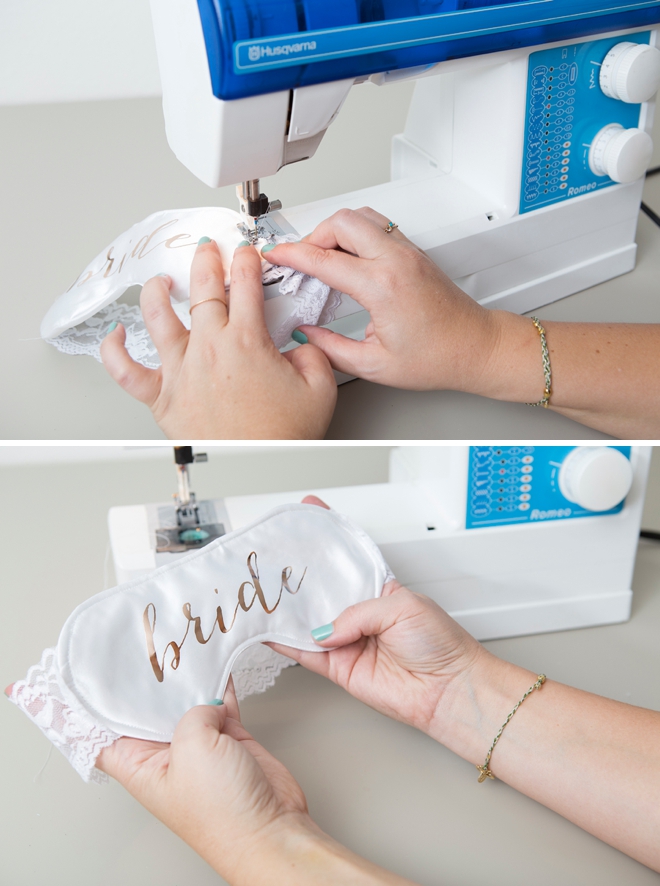
Sew Seam 1
Sew around the outside of the mask using a 3/8″ seam allowance. Leave a 2″ opening at the top of the mask to turn it right-side out.
Clip Outside
To help the fabric turn correctly, make little snips with your scissors around the entire mask about 1/4″ apart. Around the nose area do more, at like 1/8″ apart.
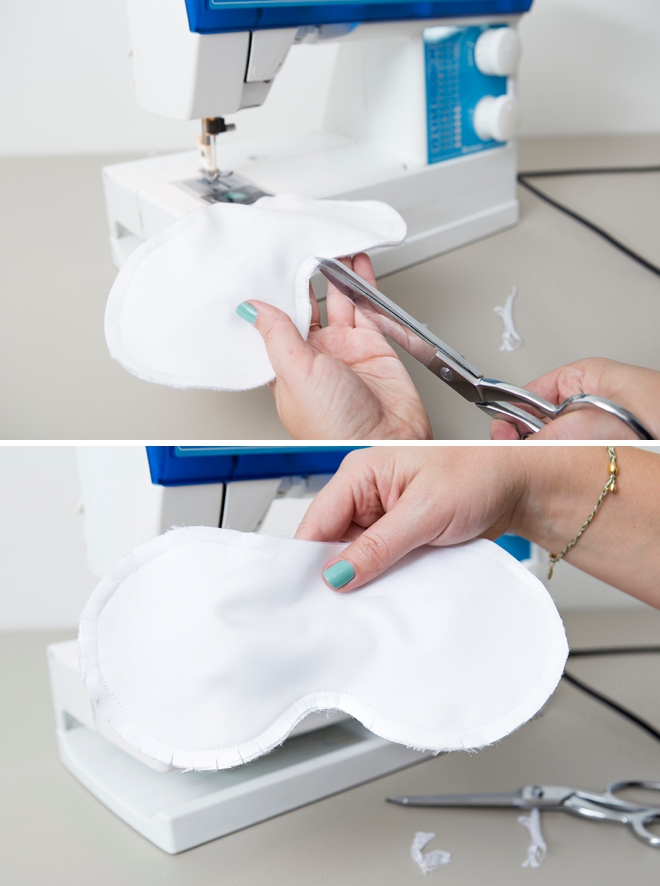
Turn Right Side Out
Put your fingers inside the opening and pull the material on the inside to the outside. Press all the seams out along the entire mask.
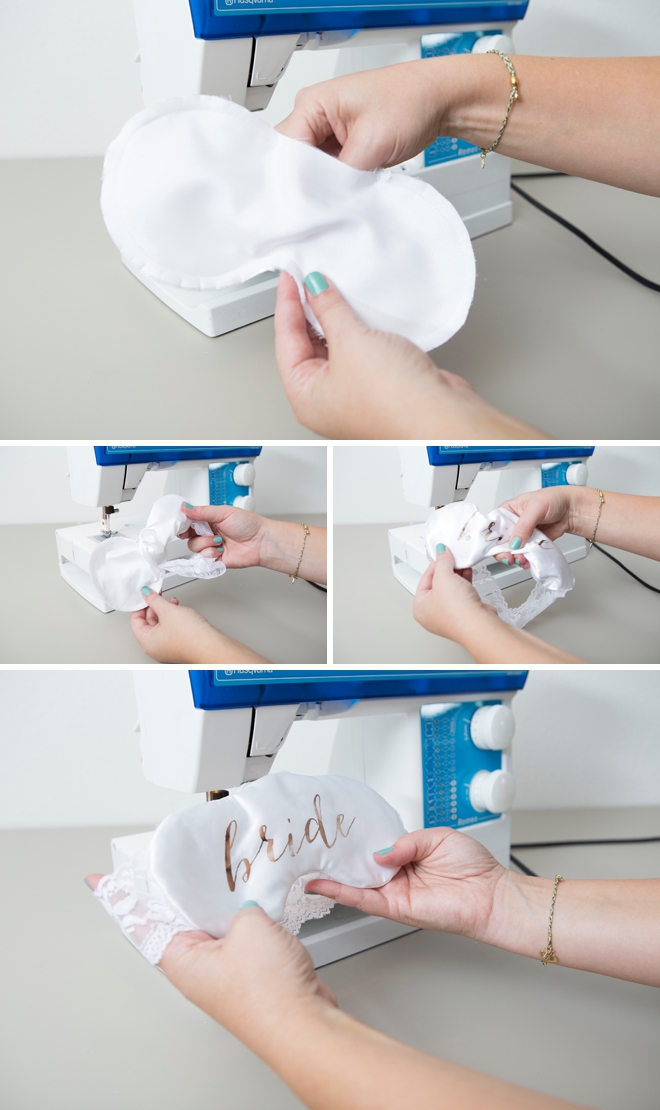
Sew Seam 2
Now sew along the entire edge of the mask using an 1/8″ seam allowance. Fold the opening edges in to match the rest of the mask and sew across to finish. That’s it!
Bachelorette Party To Honeymoon
How adorable would these be for your bachelorette party!? Especially if it’s an overnight type of getaway. Adding Mrs. Your New Last Name to one of these masks would make a lovely little item to bring along on your honeymoon… and if you’re already married you can of course make one too!


DIY TUTORIAL PARTNER:

Cricut is a world-class leader in personal electronic cutting machines that has enabled people to achieve their creative best for over 50 years. Today, millions of people use Cricut products to create unique projects, and they focus on enhancing lives with this power of creativity. Let Cricut help you take your wedding personalization and project creativity to the next level!


As with all our DIY tutorials, if you create one of our projects please send us a picture – We Love Seeing Your Creativity! If you use Instagram or Twitter please use the hashtag #SomethingTurquoiseDIY and it will show up on our Get Social page. Happy Crafting!
DIY Tutorial Credits
Photography + DIY Tutorial: Jen Carreiro of Something Turquoise // Cricut Maker + Supplies: courtesy of: Cricut // SVG Design: Julia Ensign // Satin Fabrics: JoAnn // Elastic Lace: Amazon // Fusible Thermolam: Joann // Sewing Clips: Amazon // Nail Polish: OPI – Withstands the Test of Thyme
Shop The Supplies:
Find the supplies you’ll need for this project from our affiliate links below:

Comments