
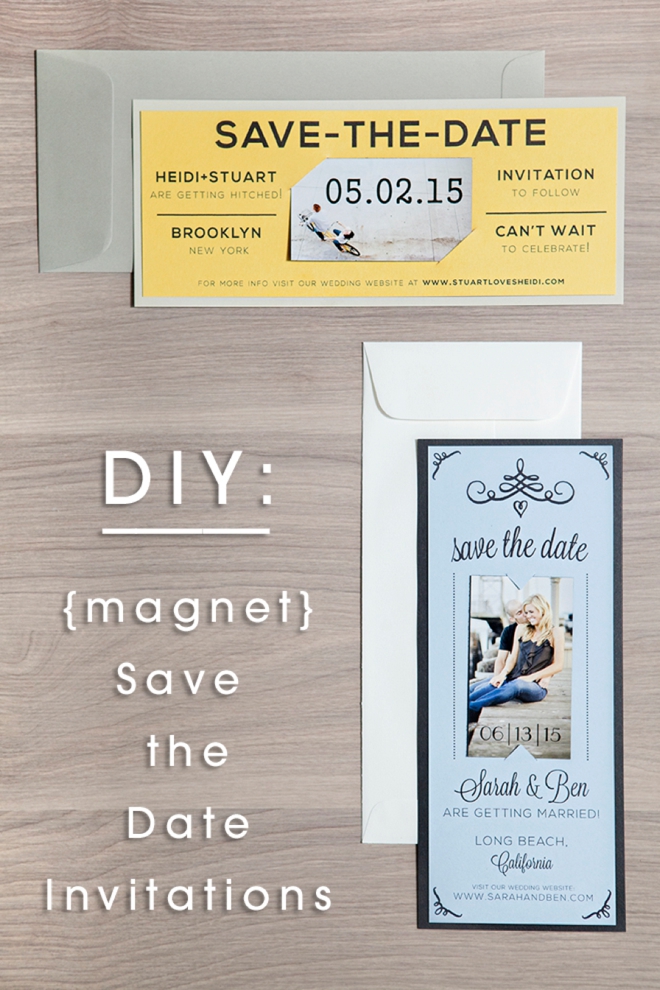
DIY | Magnet Save the Date Invitations
Welcome Budget Savvy Bride readers – we are so happy to see you!
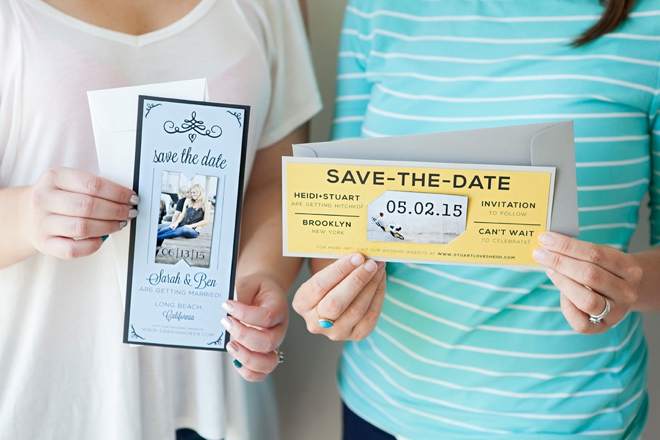
Hoooraaay… our favorite day of the week – DIY Friday!!! Today I am sharing a very special project – these darling “Magnet Save the Date Invitations” are a fun collaboration between Something Turquoise and The Budget Savvy Bride! My friend Jessica, the editor of BSB is also a talented graphic designer (and expert money-saver) so we put our creative brains together and produced these 2 cost effective, handmade Save the Date invitation ideas! She has designed 2 wonderful free downloads for you; a chic modern design and a sweet romantic style. Below, you will find all the supplies, detailed steps and crafting tips you will need to customize these adorable cards to perfectly fit your special day. Happy Crafting!
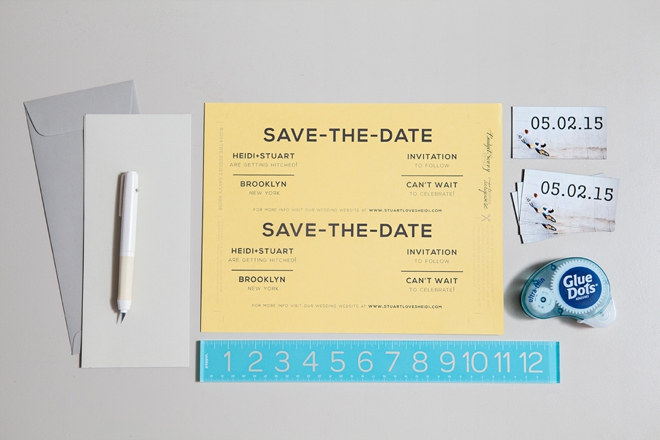
SUPPLIES:
- Order these budget friendly “business card magnets” from VistaPrint
- 8.5″ x 11″ cardstock in your choice of color
- #10 sized note cards (or cut cardstock down to 3 7/8″ x 9 1/4″)
- #10 sized envelopes
- Your favorite scrapbooking adhesive (ours is Glue Dots)
- Craft knife and cutting mat
- Ruler
- Pencil
Plus the free design printable of your choice from The Budget Savvy Bride!
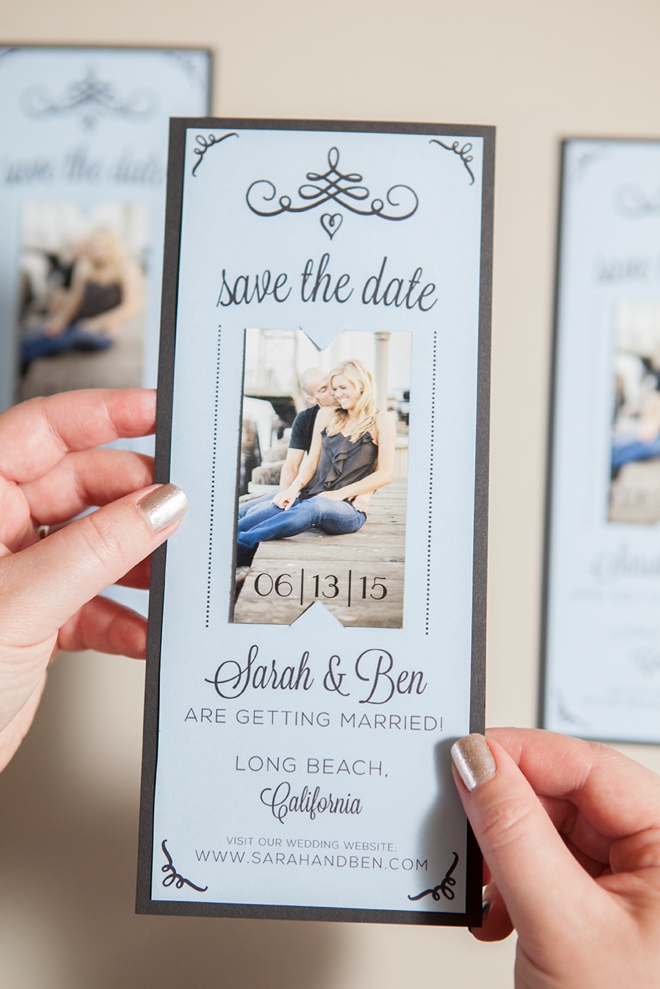
***For both the designs here, we choose paper colors that complimented each other and specifically the engagement image. Keep that in mind when choosing your paper and envelope colors!
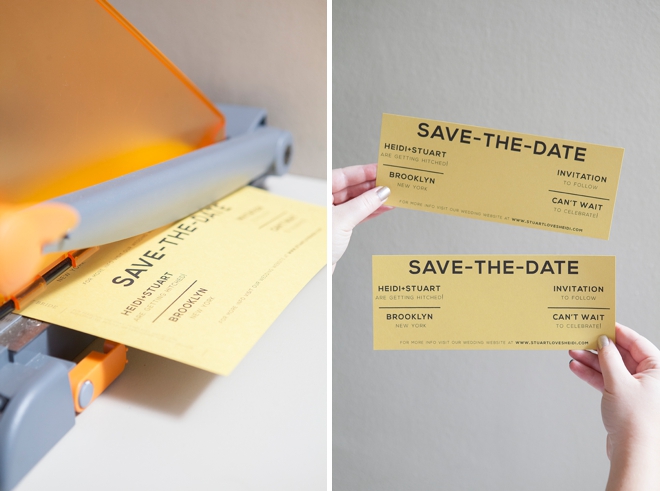
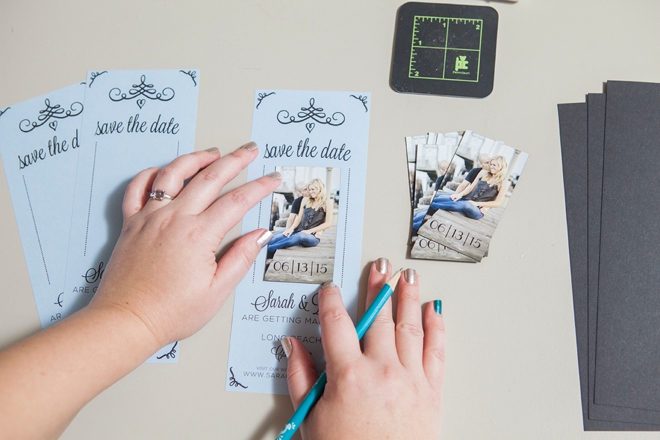
Simply download your favorite design, edit, and save – using Microsoft Word. Then print your design onto 8.5″ x 11″ cardstock of your choice. There are two invitations per page and you’ll need to cut them out (3.5″ x 9″) using a paper trimmer or a craft knife and ruler – your choice. More cutting directions are on the printouts.
All the information on fonts used and where to download them so you can edit the documents correctly are listed in detail on The Budget Savvy Bride!
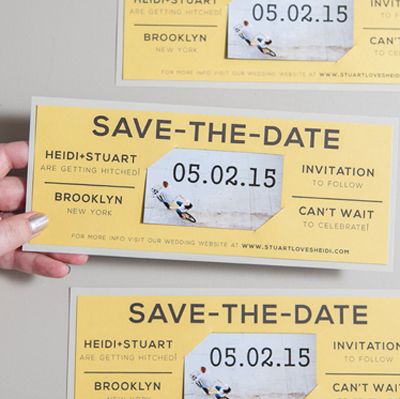
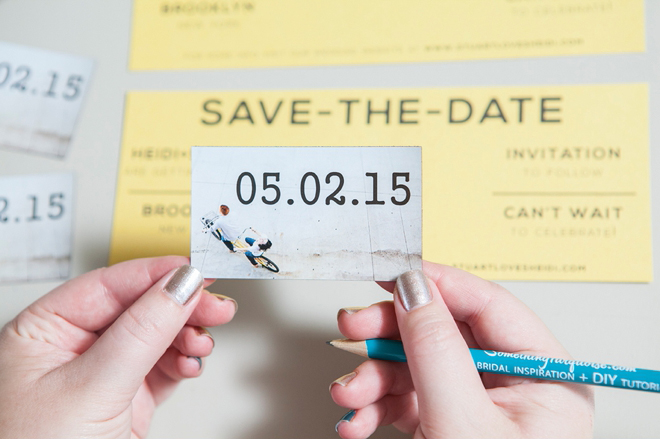
The Magnets. We purchased and designed these inexpensive magnets at VistaPrint.com. Using one of your engagement pictures, visit VistaPrint and choose “upload your own complete design” and add your picture, then add the date using their editing software and order! 25 “business card magnets” are only $8.00 and they get cheaper the more you order.
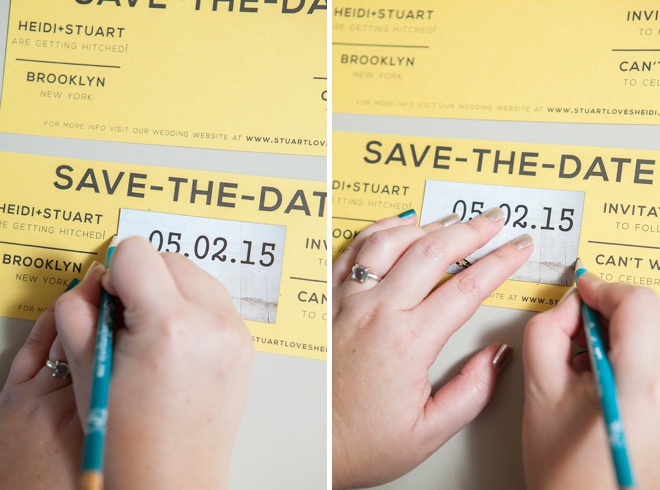
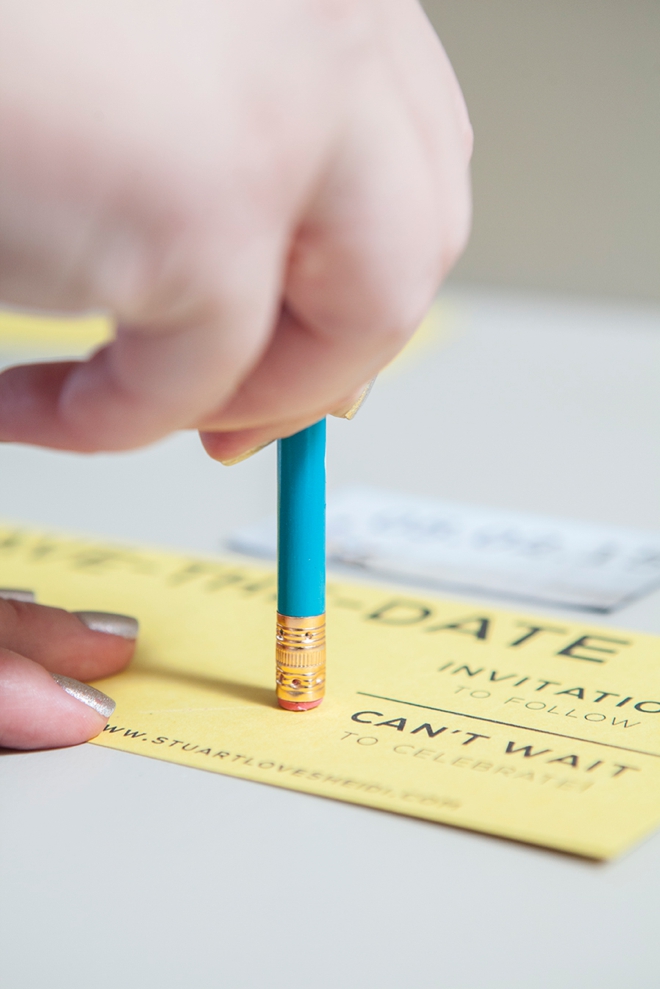
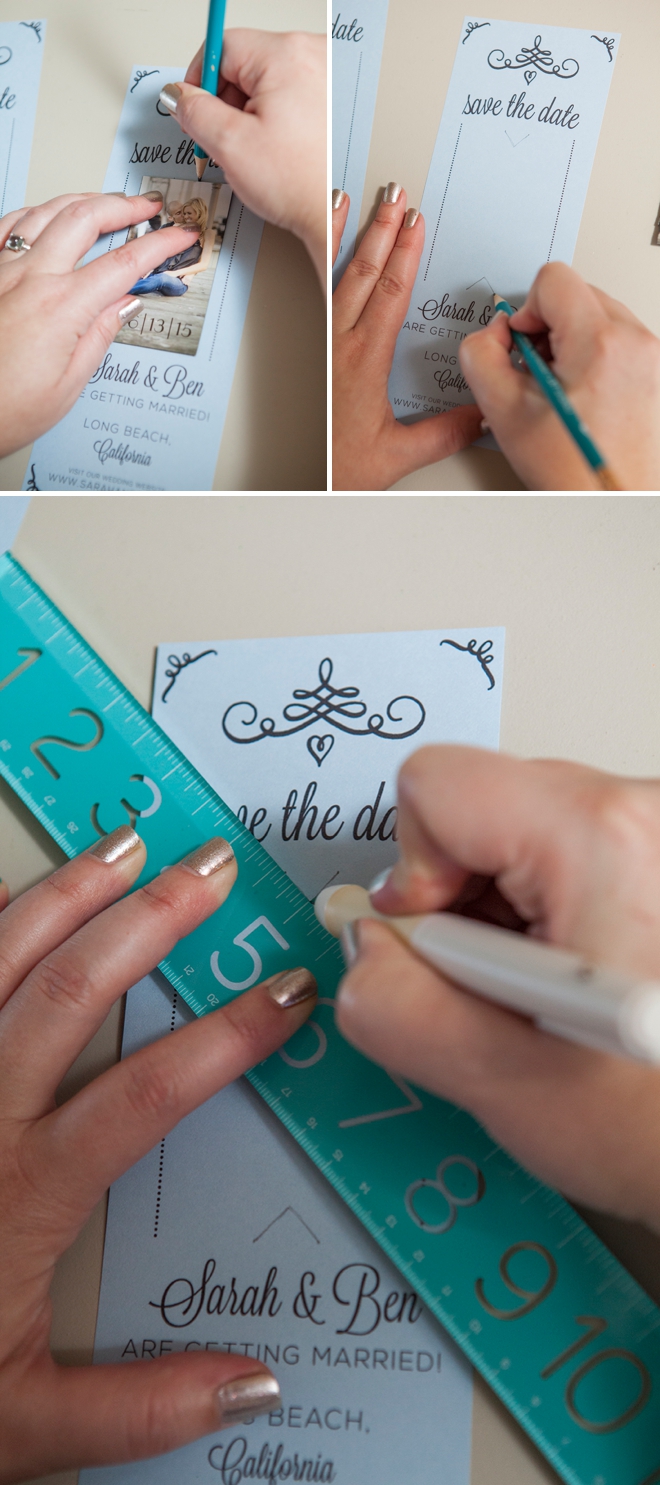
Now we will create the fun little “slit” that the magnets will fit into on your card. Place your magnet on your printout for size, make little dots on either side of one corner to give you a guideline about 1/2″ down. Do this on two opposite corners.
Then line your ruler up with the dots and slice using your craft knife – on a cutting mat of course. This easily creates the little corner pockets for the magnets to slip into.
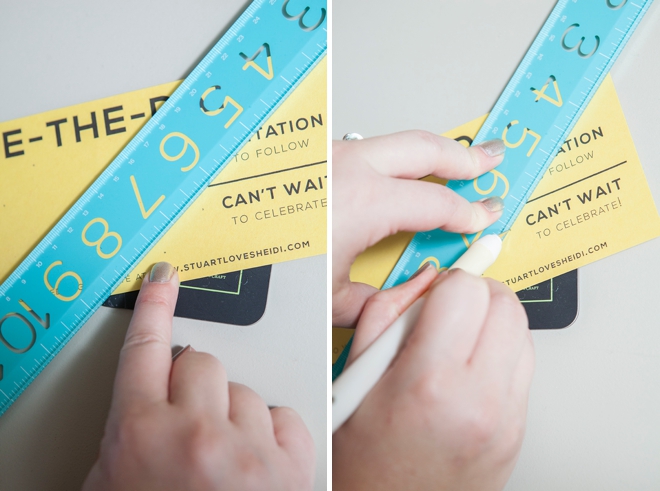
Cut two slits, on opposite corners for each invitation.
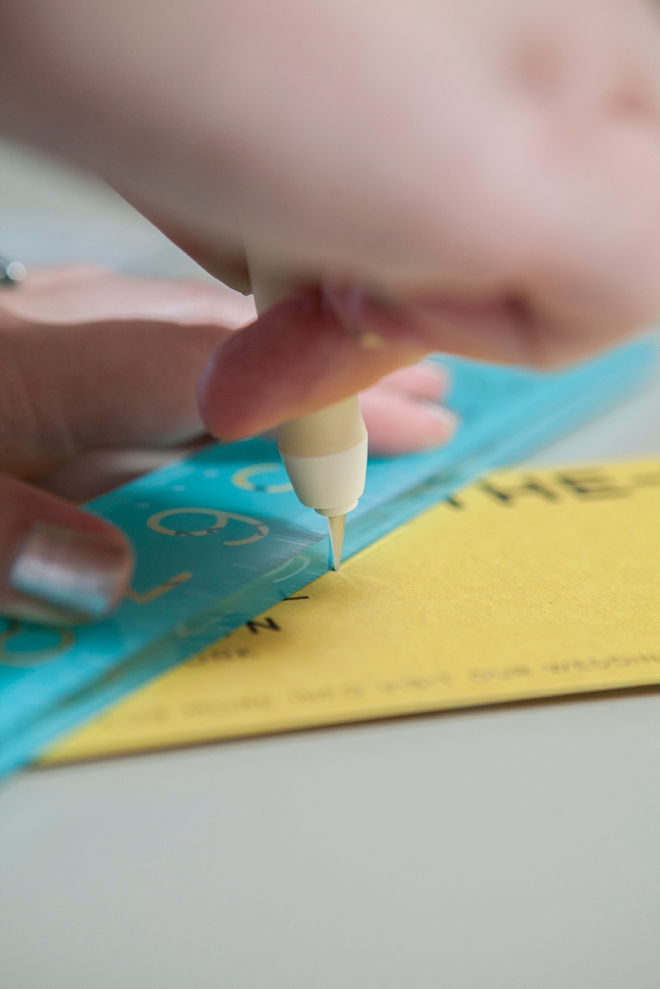
When your corner slits are complete, make sure to erase any pencil lines.
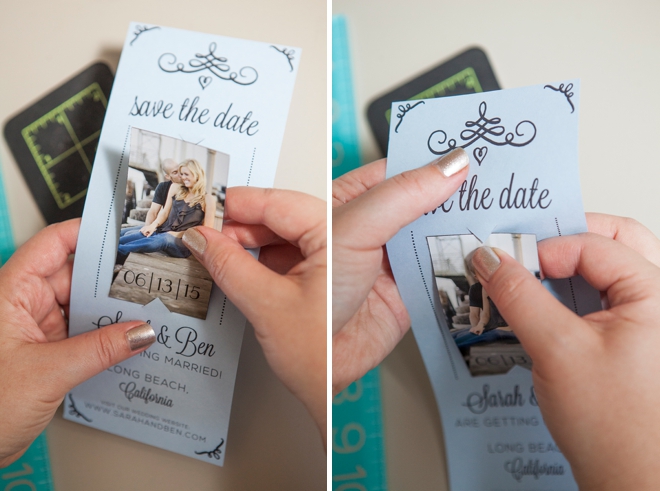
Then pop your darling magnets into each card! So cute!!!
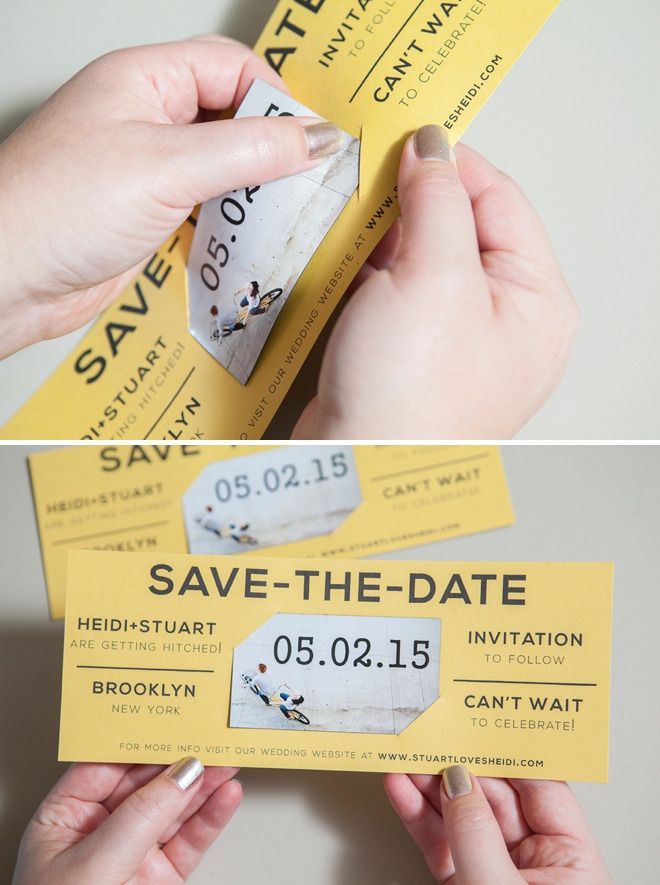
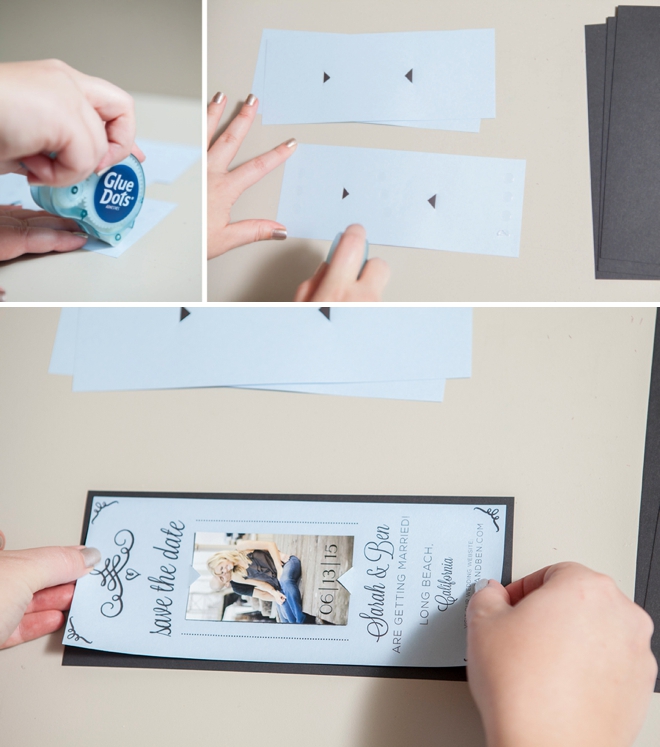
Using your choice of scrapbooking adhesive, preferably one with a roller – so you can move through this project quickly, adhere your print out card with magnet to the backing card. It is important to add the magnets before you do this step, otherwise it’s a little more difficult to get them into position.
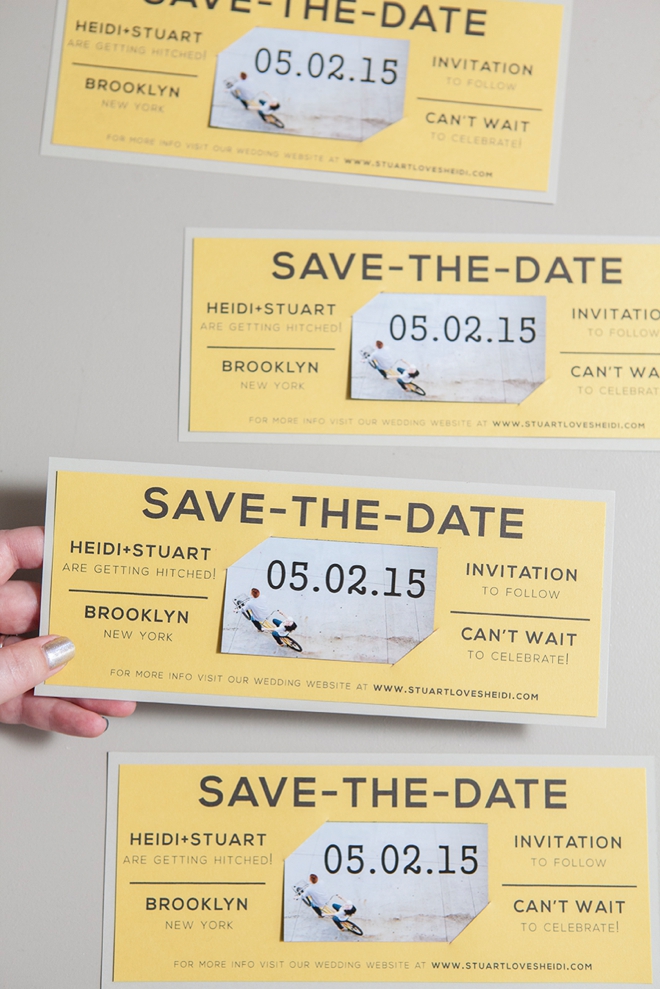
Darling, inexpensive, personal and handmade — there is nothing better!
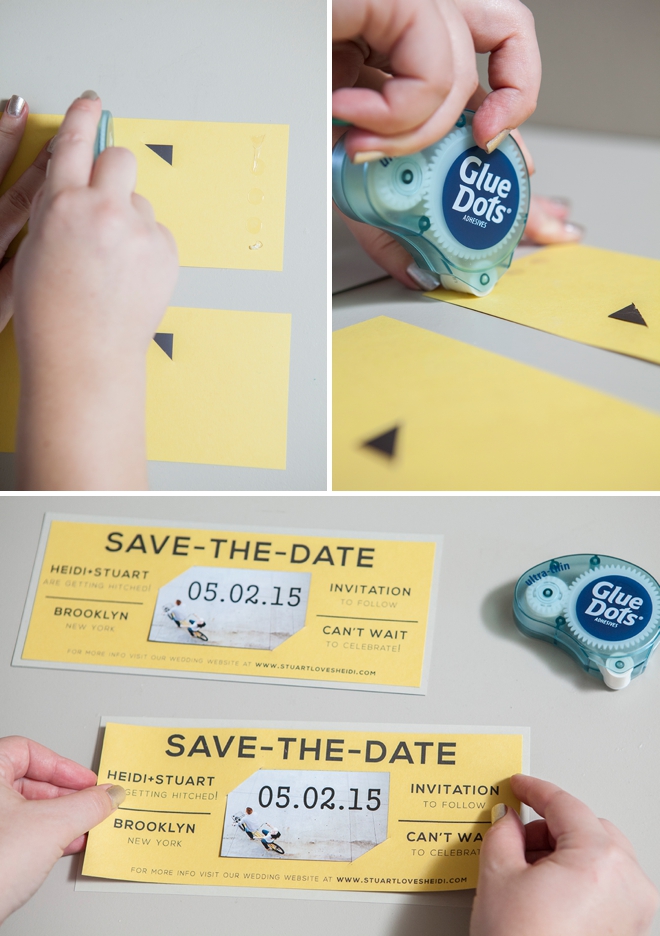
We are using the same technique for the more romantic style of invitation – except here the pocket slit is actually a little triangle.
Lay your magnet down for size, mark two dots about 1/2″ apart at the top and center of the magnet and then draw a triangle – cut with your craft knife and ruler!
I love how this triangle cut looks… unique and a little fancy!
Using your favorite scrapbooking adhesive place your printout and magnet card onto your choice of cardstock backing.
Aren’t these just lovely?! We’ve created both designs to print in pure black so that you can choose any color cardstock that fits your wedding theme.
It was so fun having Jessica visit me in California (she’s from NYC) to help shoot and create this project. Hopefully we will have many more projects like this for you in the future!
As with all our DIY tutorials, if you create one of our projects please send us a picture or a trackback – We Love Seeing Your Creativity! If you use Instagram or Twitter please use the hashtag #SomethingTurquoiseDIY. Happy Crafting!
DIY Tutorial Credits
DIY Photography + modern invitation magnet image: Studio 11 Weddings // DIY tutorial: Jen | Something Turquoise // FREE design downloads courtesy of Jessica from: The Budget Savvy Bride // #10 envelopes in Gravel and Superfine White, #10 note cards in Cement and Black, 8.5″ x 11″ coverweight (cardstock) paper in Curry and Bluebell from: Paper-Source // Martha Stewart Crafts cutting knife: Amazon![]() // ultra thin adhesive Glue Dots: courtesy of Glue Dots // nails: OPI – Designer de Better
// ultra thin adhesive Glue Dots: courtesy of Glue Dots // nails: OPI – Designer de Better![]() and Essie Trophy Wife
and Essie Trophy Wife![]() // Special thanks and photo credit to Nick Charrow Photography for the romantic invitation magnet image!
// Special thanks and photo credit to Nick Charrow Photography for the romantic invitation magnet image!

Comments